Englander Pellet Stove Manual: A Comprehensive Guide
Englander PDVC-25 owners frequently encounter issues like E2 errors‚ auger squeaks‚ and insufficient heat. This manual aims to provide solutions and maintenance guidance‚ drawing from user experiences.
Englander pellet stoves have become a popular choice for supplemental heating‚ offering efficiency and convenience. However‚ like any heating appliance‚ they require understanding and proper maintenance. Many users‚ sharing experiences online‚ highlight the PDVC-25 model as a common unit. These stoves utilize wood pellets as fuel‚ providing a renewable and cost-effective heating solution.
This guide serves as a comprehensive resource for Englander pellet stove owners‚ addressing common issues and providing detailed instructions. From initial setup to advanced troubleshooting‚ we’ll cover essential aspects of operation and care. User feedback indicates potential challenges with heat output and component longevity‚ which we will address thoroughly. Proper operation and regular maintenance are key to maximizing the lifespan and performance of your Englander stove.
Understanding Your Englander PDVC-25 Model
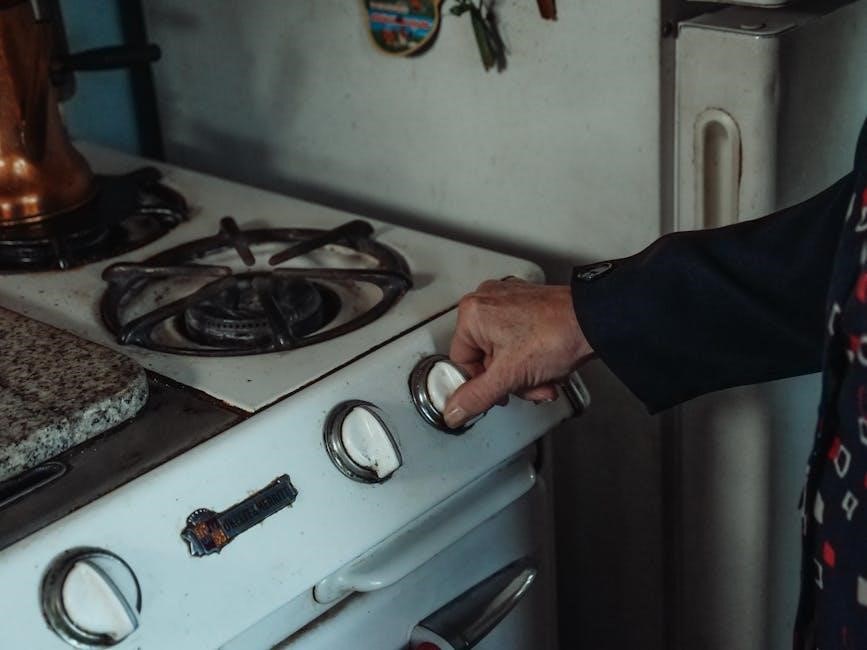
The Englander PDVC-25 is a freestanding pellet stove known for its relatively compact size and heating capacity‚ suitable for medium-sized spaces. Users frequently discuss its automatic ignition system and adjustable heat settings. A key feature is the hopper‚ which stores the pellet fuel‚ and the auger‚ responsible for feeding pellets to the firepot.
However‚ online discussions reveal common concerns regarding consistent heat output and potential issues with the vacuum switch system. The stove utilizes both a combustion blower for airflow to the fire and a room blower to distribute heat. Understanding the function of each component is crucial for effective troubleshooting and maintenance. Familiarize yourself with the control panel and its settings for optimal performance.
Safety Precautions and Warnings
Serious injury or fire can result from improper operation. Always ensure proper ventilation and maintain clearances from combustible materials as specified in the installation manual. Never store flammable liquids or materials near the stove. Regularly inspect the venting system for obstructions and damage‚ as creosote buildup poses a fire hazard.
Keep children and pets supervised around the hot stove surfaces. Do not overload the hopper with pellets. Disconnect power before performing any maintenance or cleaning. Be cautious of hot exhaust gases and surfaces during and after operation. A carbon monoxide detector is strongly recommended. Follow all local codes and regulations regarding pellet stove installation and use.

Operation and Startup
Successful startup involves proper pellet loading‚ automatic ignition‚ and adjusting burn settings. Some users prefer a butane torch for quicker initial pot temperature.
Initial Setup and First-Time Use
Before your inaugural burn‚ thoroughly inspect the Englander PDVC-25 for any shipping damage. Ensure the unit is placed on a non-combustible hearth‚ adhering to specified clearances detailed in the full manual. A crucial first step is priming the auger; run the stove on a low setting for approximately 30-60 minutes without pellets to ensure proper lubrication and functionality.
This initial run helps distribute lubricant throughout the auger system. Following this‚ carefully load the hopper with high-quality pellets – avoid mixing types. Be prepared for a slightly smoky start as the stove establishes its burn cycle. Monitor closely during the first few cycles‚ adjusting air settings as needed to achieve a clean‚ efficient flame. Familiarize yourself with the control panel and error codes.
Loading the Hopper with Pellets
The Englander PDVC-25 hopper capacity is substantial‚ minimizing frequent refills. However‚ proper loading is key. Always use dry‚ high-quality wood pellets; avoid mixing different pellet types as this can cause combustion issues. Gently pour pellets into the hopper‚ avoiding forceful dumping which can damage the auger system.
Do not overfill the hopper beyond the maximum fill line indicated. A consistent pellet supply is vital for stable operation. Regularly check the pellet level‚ especially during extended burns. Some users suggest a small initial load during startup to gauge the stove’s consumption rate. Ensure the hopper lid seals tightly to prevent moisture ingress and maintain pellet quality.
Starting the Stove: Automatic Ignition Sequence
The Englander PDVC-25 initiates with an automatic ignition sequence. Upon power-up‚ the auger delivers pellets to the firepot. Simultaneously‚ the igniter glows‚ attempting to ignite the fuel. This initial pellet dump is substantial‚ designed to establish a robust flame. Some users report excessive pellet dumping during this phase.
An alternative method‚ suggested by experienced owners‚ involves using a butane torch to directly ignite the pellets‚ bypassing the built-in igniter for quicker startup. Monitor the flame closely; successful ignition is indicated by a consistent‚ blue flame. If ignition fails after several attempts‚ consult the troubleshooting section for potential causes and solutions.
Adjusting Heat Output and Burn Settings
Optimizing heat output on your Englander PDVC-25 involves adjusting both the auger rate and the combustion blower speed. User experiences suggest settings aren’t universal; experimentation is key. One owner reported success with an auger rate of ‘2’ and a blower rate of ‘4’‚ but your stove may differ.
Lower auger rates reduce pellet feed‚ decreasing heat. Higher blower speeds increase combustion‚ potentially improving heat distribution but also increasing pellet consumption. Start with moderate settings and incrementally adjust‚ observing the flame and room temperature. Remember to allow sufficient time for changes to take effect before making further adjustments.

Troubleshooting Common Issues
Frequent problems with the Englander PDVC-25 include E2 errors‚ auger squealing‚ excessive pellet dumping‚ and inadequate heat output—all addressed herein.
Error Code E2: Diagnosis and Solutions
The E2 error code on the Englander PDVC-25 is a common frustration for owners‚ often indicating a problem with the vacuum switch system. Many users report tirelessly replacing components – vacuum hoses‚ switches‚ even the combustion and room blowers – without resolving the issue. A thorough inspection of all vacuum lines for cracks or disconnections is crucial.
Ensure the hoses are securely connected to both switches. Beyond the hoses and switches themselves‚ consider the age of the stove; a 16-year-old unit may have internal issues. Deep dives into the manual and online forums suggest this error can be persistent‚ sometimes indicating a more fundamental problem beyond easily replaceable parts. Don’t overlook door and window gaskets!
Addressing Auger Squeaking Noises
A frequent complaint among Englander PDVC-25 owners is a persistent squeaking sound emanating from the auger. This noise is overwhelmingly attributed to creosote buildup accumulating on the auger itself‚ particularly at the auger’s faceplate. Fortunately‚ this is often a straightforward fix.
Accessing the auger faceplate from the front of the stove allows for easy removal of creosote deposits using a screwdriver. This avoids the more complex task of removing the auger from the rear. Regular inspection and cleaning of the auger can prevent this squeaking from recurring‚ ensuring quieter and more efficient stove operation. It’s a simple maintenance step with significant benefits.
Excessive Pellet Dumping During Startup
Many Englander PDVC-25 users report an issue with the stove dumping an excessive amount of pellets during the initial startup phase. This is by design – the stove is programmed to deliver a larger fuel load to quickly establish a robust fire. However‚ this quantity often proves to be too much‚ leading to inefficient combustion and potential issues.
One workaround suggested by experienced owners is supplementing or replacing the automatic ignition with a butane torch. This allows for faster pot temperature rise‚ potentially reducing the need for such a large initial pellet dump. Experimenting with auger and blower rate settings is also crucial; a setting of 2 for the auger and 4 for the blower proved effective for some users.
Insufficient Heat Output: Potential Causes
A common complaint among Englander PDVC-25 owners is a lack of adequate heat‚ despite the stove appearing to function. Several factors can contribute to this issue. Some users have experienced consistently low heat output even after replacing components like the room blower and other parts‚ suggesting a deeper underlying problem.
Poor pellet quality can significantly impact heat production. Additionally‚ a buildup of creosote or other obstructions within the heat exchanger can restrict airflow and reduce efficiency. Thorough cleaning‚ including the heat exchanger‚ is essential. In some cases‚ the stove may simply be underperforming‚ leading owners to consider replacement after a few seasons of use.

Maintenance and Cleaning
Regular cleaning‚ including the heat exchanger and auger‚ is crucial for optimal performance. Inspect vacuum switches and address creosote buildup proactively to maintain efficiency.
Regular Cleaning Schedule
Establishing a consistent cleaning routine is paramount for your Englander pellet stove’s longevity and efficiency. Daily‚ remove ash from the firepot – a small accumulation is normal‚ but excessive buildup hinders combustion. Weekly‚ inspect and clean the glass door with a specialized pellet stove cleaner to maintain visibility. Monthly‚ thoroughly vacuum the hopper area to prevent dust and debris from entering the system.
Crucially‚ at least twice during the heating season‚ perform a deep clean. This includes removing and cleaning the heat exchanger‚ inspecting the auger for creosote buildup (addressing it with a screwdriver if necessary)‚ and verifying the vacuum switch functionality. Following this schedule will minimize issues and maximize heat output.
Cleaning the Heat Exchanger
The heat exchanger requires periodic cleaning to maintain optimal performance. Begin by completely shutting down and disconnecting the stove. Carefully remove the heat exchanger‚ following the instructions in your full Englander manual. Use a vacuum with a brush attachment to remove loose ash and debris from the fins.
For stubborn creosote buildup‚ a specialized heat exchanger cleaning brush is recommended. Gently brush along the fins‚ avoiding damage. Vacuum again to remove dislodged particles. Inspect the heat exchanger for any signs of corrosion or damage. Reinstall carefully‚ ensuring a proper seal. A clean heat exchanger significantly improves heat transfer and efficiency.
Auger Maintenance and Creosote Removal
Regular auger maintenance is crucial for preventing jams and ensuring consistent pellet delivery. A common issue is creosote buildup‚ causing squeaking noises. Access the auger from the front of the stove‚ if possible‚ to minimize disassembly. Use a screwdriver to carefully scrape away creosote accumulation at the auger face – this is a frequent buildup point.
Inspect the auger flight for wear or damage. Rotate the auger manually to check for smooth operation. Lubricate the auger with a high-temperature grease specifically designed for pellet stoves. Avoid excessive lubrication; Thoroughly clean the auger housing‚ removing any loose pellets or debris. Proper auger maintenance extends the life of your Englander stove.
Vacuum Switch Inspection and Cleaning
The vacuum switch is vital for detecting proper draft and ensuring safe operation. A frequent cause of E2 errors‚ as reported by users‚ involves faulty vacuum switches or blocked hoses. Regularly inspect the rubber hoses connecting the switches for cracks‚ kinks‚ or disconnections. Replace any damaged hoses immediately.
Carefully clean the vacuum switches themselves. Dust and debris can obstruct the sensors. Gently blow compressed air into the switch ports to dislodge any obstructions. Test the switches with a multimeter to verify continuity. If a switch fails the test‚ replacement is necessary. Proper vacuum switch function is essential for reliable stove performance.

Component Overview
Key components include the combustion blower‚ room blower‚ vacuum switches‚ firepot‚ and igniter. Understanding these parts aids in troubleshooting and effective maintenance procedures.
Understanding the Combustion Blower
The combustion blower is a critical component responsible for supplying the necessary airflow for efficient pellet combustion within your Englander stove. It forces air into the firepot‚ fueling the burning process and maintaining optimal temperatures. A malfunctioning combustion blower can lead to incomplete combustion‚ excessive smoke‚ and reduced heat output.
Users have reported replacing the combustion blower as a troubleshooting step for error codes like E2‚ though it doesn’t always resolve the issue. When inspecting or replacing the blower‚ ensure proper connections and sealing to prevent air leaks. A failing blower may exhibit unusual noises or a noticeable decrease in airflow. Regular cleaning around the blower housing is also recommended to ensure unobstructed operation and prevent overheating.
Room Blower Functionality and Replacement
The room blower circulates heated air away from the firebox and throughout the room‚ distributing warmth effectively. Many Englander PDVC-25 owners have experienced issues with insufficient heat‚ even after replacing the room blower. This suggests the problem may lie elsewhere‚ such as airflow restrictions or other component failures.
If the room blower isn’t functioning correctly‚ check for obstructions and ensure it’s receiving power. Replacement is relatively straightforward‚ but proper wiring connections are crucial. Some users have noted that even a new room blower doesn’t always dramatically improve heat output on this model‚ indicating a potential design limitation or other underlying issues requiring professional diagnosis.
Vacuum Switches: Purpose and Testing
Vacuum switches are critical for safe operation‚ monitoring draft and ensuring proper exhaust. A common issue with the Englander PDVC-25 is the E2 error code‚ often linked to faulty vacuum switches or their connecting hoses; Users report replacing both rubber hoses and the switches themselves without resolving the error‚ highlighting potential complexities.
Testing involves verifying continuity with a multimeter when suction is applied. Inspect hoses for cracks or blockages. Ensure proper seating and airtight connections. If the switches fail testing‚ replacement is necessary. However‚ remember that persistent E2 errors after replacing these components suggest a deeper problem‚ potentially within the venting system or combustion blower.
Firepot and Igniter Maintenance
The firepot is where combustion begins‚ and its condition directly impacts ignition success. Regular inspection for cracks or excessive wear is crucial. Some users bypass the built-in igniter‚ opting for a butane torch to quickly reach ignition temperature‚ especially during initial startup. This suggests the igniter may be a common weak point.
Ensure the igniter glows brightly when activated. A dim or flickering glow indicates a failing igniter requiring replacement. Clean the firepot thoroughly during annual maintenance‚ removing any ash or debris. Proper airflow around the firepot is essential; obstructions can hinder ignition and reduce efficiency. Consistent cleaning extends component life.

Advanced Troubleshooting
Persistent issues may require diagnosing vacuum leaks‚ replacing door/window gaskets‚ analyzing airflow‚ and meticulously checking electrical components for proper function.
Diagnosing Vacuum Leaks
Vacuum leaks are a common culprit behind the frustrating E2 error code in Englander PDVC-25 stoves. Thoroughly inspect the rubber hoses connecting to the vacuum switches; cracks or disconnections are prime suspects. Replacing these hoses is a simple first step‚ often resolving the issue.
If the problem persists‚ carefully examine the vacuum switches themselves. Use a vacuum gauge to test their functionality‚ ensuring they’re holding a consistent vacuum. Pay close attention to the connections at the firepot and combustion blower‚ as these areas can develop leaks over time. A smoke test‚ using a smoke pencil‚ can help pinpoint elusive leak locations by revealing escaping smoke.
Remember to check the door and window gaskets as well‚ as compromised seals can affect overall stove pressure and contribute to vacuum issues.
Replacing Door and Window Gaskets

Degraded door and window gaskets significantly impact combustion efficiency and can contribute to error codes like E2. Inspect the gaskets for cracks‚ brittleness‚ or compression. A visual assessment often reveals obvious damage‚ but even subtle deterioration can cause air leaks.
Replacement involves carefully removing the old gasket – often held in place by adhesive or a retaining channel – and cleaning the groove thoroughly. Apply a high-temperature gasket sealant to the new gasket before installation‚ ensuring a tight‚ airtight seal.
Properly seated gaskets are crucial for maintaining correct stove pressure and optimal performance. A poorly fitted gasket won’t resolve the issue and may even worsen it. Consider using a gasket specifically designed for pellet stoves to ensure compatibility and longevity.
Analyzing Combustion Airflow
Insufficient or erratic combustion airflow is a common culprit behind poor heating performance and incomplete pellet combustion. Begin by verifying the intake and exhaust vents are unobstructed‚ ensuring adequate fresh air supply. Observe the flame pattern; a lazy‚ yellow flame indicates insufficient oxygen‚ while a lively‚ blue flame suggests proper airflow.
Check the combustion blower for proper operation and speed. A failing blower can restrict airflow. Examine the venting system for blockages or leaks‚ as these disrupt the draft.
Ensure the stove is receiving adequate draft‚ especially when operating with longer vent runs. Proper airflow is vital for efficient burning and minimizing creosote buildup. Adjusting blower settings may improve combustion.
Electrical Component Checks
Before undertaking any electrical checks‚ ALWAYS disconnect the stove from the power source! Begin by inspecting the wiring for loose connections‚ frayed wires‚ or signs of burning. Carefully examine the igniter for continuity using a multimeter; a faulty igniter prevents proper startup.
Test the combustion and room blowers for correct voltage and amperage draw‚ comparing readings to the stove’s specifications. Verify the vacuum switches are functioning correctly‚ ensuring they open and close as intended.
Check the control board for any visible damage‚ such as burnt components. If unsure‚ consult a qualified technician for electrical diagnostics and repairs.
Long-Term Care and Considerations
Pellet quality significantly impacts stove performance; store pellets properly to prevent moisture damage. Regular maintenance extends lifespan‚ but professional service may become necessary over time.
Pellet Quality and Storage
Maintaining optimal pellet quality is crucial for efficient stove operation and longevity. Not all pellets are created equal; hardwood pellets generally offer higher BTU output and less ash compared to softwood varieties. Moisture content is paramount – ideally‚ pellets should have less than 20% moisture. Damp pellets lead to difficult ignition‚ reduced heat‚ and increased creosote buildup.
Proper storage is key to preserving pellet quality. Store pellets in a dry‚ well-ventilated area‚ protected from rain and snow. Avoid direct contact with the ground; use pallets to elevate the bags. A shed or garage is preferable to outdoor storage‚ even with a tarp. Regularly inspect bags for tears or damage‚ and use the oldest pellets first to prevent degradation over time. Consider the impact of pellet type on your Englander stove’s performance.
Extending the Life of Your Englander Stove
Proactive maintenance is vital for maximizing the lifespan of your Englander pellet stove. Regular cleaning‚ as detailed in the maintenance section‚ prevents creosote buildup and ensures efficient operation. Addressing issues like auger squeaks promptly avoids further damage. Inspect door and window gaskets annually‚ replacing them if worn to maintain a tight seal and optimal combustion.
Consider the long-term implications of pellet choice and usage. Using high-quality pellets minimizes ash and residue‚ reducing strain on components. Avoid overfilling the hopper‚ as excessive pressure can damage the auger system. If consistent heat output issues persist‚ despite diligent maintenance‚ explore professional servicing options before a minor problem escalates into a costly repair or replacement.
When to Consider Professional Service
Despite diligent home maintenance‚ certain issues necessitate professional intervention. If you’ve exhausted troubleshooting steps for persistent error codes – like the frustrating E2 – without resolution‚ a technician is crucial. Similarly‚ if heat output remains consistently low despite cleaning‚ gasket replacement‚ and proper pellet selection‚ expert diagnosis is needed.
Electrical component issues should always be handled by a qualified professional. Attempting repairs yourself can be dangerous. Recurring vacuum leaks‚ even after switch inspection‚ indicate a deeper problem. Don’t hesitate to seek service if you’re uncomfortable with any repair‚ or if the stove exhibits unusual noises or behaviors beyond the scope of this manual’s guidance. Prioritize safety and longevity.