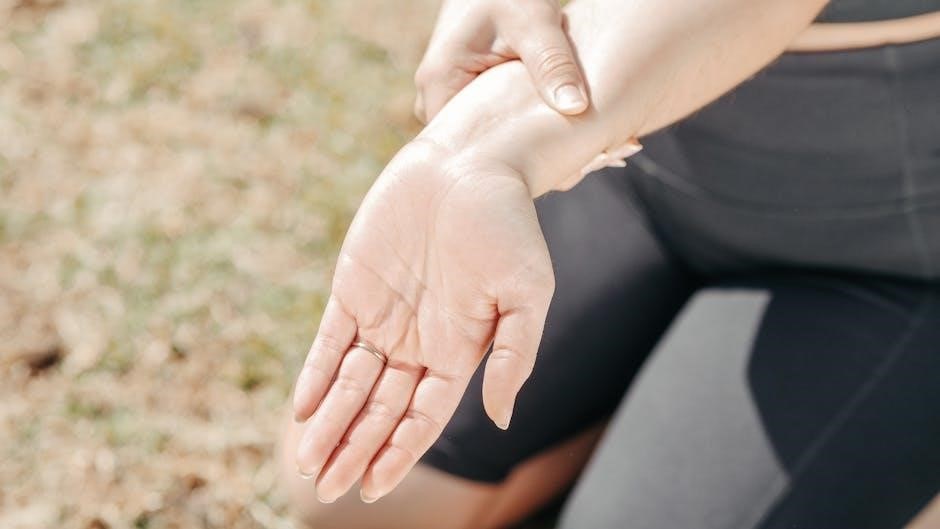
Achilles Tendon Rupture Rehab Exercises: A Comprehensive Plan
Rehabilitation post-rupture focuses on restoring function‚ mobility‚ and strength. Current research explores surgical versus non-surgical approaches‚ often utilizing bracing and active programs.
Phase 1: Initial Immobilization & Early Motion (0-2 Weeks)
This initial phase prioritizes protecting the repaired Achilles tendon while initiating gentle movement to prevent stiffness. Strict adherence to immobilization protocols‚ typically involving a cast or boot‚ is crucial during the first week. Weight-bearing is generally restricted to minimize stress on the repair site. However‚ early controlled motion is introduced to maintain some range of motion and prevent excessive scar tissue formation.
Focus is placed on non-weight-bearing exercises. Ankle pumps‚ performed frequently throughout the day‚ help to stimulate circulation and reduce swelling. Toe curls and extensions engage the intrinsic foot muscles without directly loading the tendon. These exercises are performed gently and within a pain-free range. The goal isn’t to aggressively strengthen‚ but to maintain a basic level of muscle activation and prevent complete immobilization. Careful monitoring for signs of complications‚ such as increased pain or swelling‚ is essential during this delicate phase of recovery.
Protecting the Repair
The cornerstone of Phase 1 is safeguarding the surgically repaired or conservatively managed Achilles tendon. Initial immobilization‚ typically with a cast or functional brace‚ is paramount to prevent re-rupture and allow for adequate tissue healing. Weight-bearing restrictions are strictly enforced‚ often limiting activity to non-weight-bearing status for a specified period‚ usually the first week or two.
This protective phase minimizes stress on the healing tendon‚ allowing collagen fibers to align and gain strength. Adherence to prescribed immobilization protocols is non-negotiable. Any activity that causes pain or increases swelling must be immediately discontinued. Regular monitoring by a healthcare professional is vital to assess the healing process and adjust the rehabilitation plan accordingly. The goal is to create a stable environment for the tendon to heal‚ setting the stage for progressive loading in subsequent phases. Premature loading can jeopardize the repair and delay recovery.
Ankle Pumps
Initiated immediately post-immobilization‚ ankle pumps are a foundational exercise in Phase 1‚ promoting early motion and circulation. While keeping the leg elevated‚ gently move the foot up and down‚ pointing the toes towards the head (dorsiflexion) and then away (plantarflexion). This simple movement helps reduce swelling‚ prevents stiffness‚ and encourages blood flow to the injured area‚ crucial for tissue healing.
Perform ankle pumps frequently throughout the day – aim for 3-4 sets of 10-20 repetitions. The motion should be pain-free and controlled; avoid forceful or jerky movements. This exercise doesn’t directly stress the Achilles tendon but maintains joint mobility and prepares the ankle for more advanced exercises. It’s a safe and effective way to combat the negative effects of immobilization. Consistent performance of ankle pumps is a key component of early rehabilitation‚ laying the groundwork for a successful recovery process.
Toe Curls & Extensions
Following the initiation of ankle pumps‚ toe curls and extensions further enhance early motion and intrinsic foot muscle activation within Phase 1. To perform toe curls‚ place a small towel on the floor and attempt to scrunch it up with your toes‚ pulling it towards you. Conversely‚ toe extensions involve straightening the toes and lifting them upwards‚ resisting gravity.
Complete 3-4 sets of 10-15 repetitions for each exercise‚ focusing on controlled movements. These exercises don’t directly load the Achilles tendon but improve circulation within the foot and ankle‚ and begin to re-establish neuromuscular control. They help prevent muscle atrophy and maintain flexibility in the toes and surrounding structures. Pain should be minimal; modify the range of motion if discomfort arises. Consistent execution of toe curls and extensions contributes to a more comprehensive early rehabilitation strategy‚ preparing the foot for weight-bearing and progressive loading.
Phase 2: Controlled Motion & Strengthening (2-6 Weeks)
Transitioning from initial immobilization‚ Phase 2 prioritizes regaining a greater range of motion and initiating gentle strengthening. This stage‚ typically spanning weeks 2-6 post-injury‚ builds upon the foundation established in Phase 1. The focus shifts towards controlled movements that progressively load the Achilles tendon‚ preparing it for more demanding activities.
Exercises during this phase include heel slides‚ towel slides‚ and isometric exercises targeting dorsiflexion‚ plantarflexion‚ inversion‚ and eversion. Short foot exercises are also incorporated to enhance intrinsic foot muscle strength. A supervised active rehabilitation program is often employed‚ utilizing a minimally invasive suture system if surgery was performed. The goal is to restore near-normal ankle mobility and begin rebuilding strength without overloading the healing tendon. Pain management remains crucial‚ and progression is guided by individual tolerance and clinical assessment. Careful monitoring ensures optimal healing and prevents re-injury.
Heel Slides
Heel slides are a foundational exercise in Phase 2 rehabilitation‚ typically initiated between 2-6 weeks post-Achilles tendon rupture. This gentle movement aims to restore dorsiflexion – the ability to pull the foot upwards towards the shin – without placing excessive stress on the healing tendon. The exercise is performed by lying on your back with your leg extended and slowly sliding your heel towards your buttocks‚ bending the knee.
The movement should be controlled and pain-free‚ focusing on achieving a comfortable range of motion. Repeat the slide‚ extending the leg back to the starting position. Heel slides improve joint lubrication‚ reduce stiffness‚ and gradually increase flexibility. As strength improves‚ a light resistance band can be added around the foot to further challenge the muscles. This exercise is a key component of a supervised active rehabilitation program‚ contributing to a progressive return to function and preparing the ankle for more advanced strengthening exercises. Consistency is vital for optimal results.
Towel Slides
Towel slides‚ another crucial exercise within the 2-6 week Phase 2 of Achilles tendon rupture rehabilitation‚ enhance ankle mobility and promote gentle strengthening. This exercise utilizes a smooth surface‚ like a tile or wooden floor‚ and a small towel. The patient sits with their leg extended and places their heel on the towel.
Using the muscles of the leg and foot‚ the patient slides the towel forward and backward by moving their heel. The focus is on controlled movement‚ avoiding any sharp pain or discomfort. Towel slides work multiple muscle groups simultaneously‚ improving coordination and proprioception – the body’s awareness of its position in space. This exercise is particularly beneficial for restoring normal gait mechanics and preparing the ankle for weight-bearing activities. It’s often incorporated into a supervised rehabilitation program‚ complementing other exercises like heel slides and isometric contractions. Gradual increases in repetitions and duration are recommended as tolerated‚ always prioritizing pain-free movement.
Isometric Exercises (Dorsiflexion‚ Plantarflexion‚ Inversion‚ Eversion)
Isometric exercises‚ a cornerstone of Phase 2 (2-6 weeks) rehabilitation‚ are vital for activating the muscles around the ankle without joint movement. These exercises involve contracting the muscles against an immovable resistance‚ building strength and stability without stressing the healing Achilles tendon. Dorsiflexion involves pulling the toes towards the shin‚ plantarflexion points the toes downwards‚ inversion turns the sole of the foot inward‚ and eversion turns it outward.
Each movement is held for 5-10 seconds‚ repeated several times throughout the day. A wall or a sturdy object can provide the necessary resistance. Isometric exercises are particularly beneficial in the early stages of recovery as they minimize stress on the repaired tendon while maintaining muscle activation. They help prevent muscle atrophy and improve neuromuscular control. Integrating these exercises into a supervised active rehabilitation program‚ as highlighted in recent studies‚ is crucial for optimal outcomes. Pain should be monitored closely‚ and exercises adjusted accordingly‚ ensuring a safe and effective progression.
Short Foot Exercises
Short foot exercises are a subtle yet powerful component of Phase 2 rehabilitation (2-6 weeks)‚ focusing on intrinsic foot muscle activation. These exercises aim to improve foot arch support and control‚ contributing to overall ankle and lower leg stability – crucial after an Achilles tendon rupture. The technique involves attempting to “shorten” the foot by drawing the ball of the foot towards the heel without curling the toes or lifting the arch excessively.
Imagine creating a dome shape on the inside of your foot. Hold this contraction for 5-10 seconds‚ repeating 10-15 times. Initially‚ performing this exercise seated may be easier. As strength improves‚ progress to standing. This exercise enhances proprioception and prepares the foot for more demanding activities. Integrating short foot exercises into a comprehensive‚ supervised rehabilitation program‚ as advocated by current research‚ supports functional recovery. It’s a foundational element for restoring natural movement patterns and preventing re-injury‚ complementing other strengthening and mobility work.
Phase 3: Progressive Loading & Strengthening (6-12 Weeks)
This phase marks a significant step towards regaining full function‚ transitioning from controlled motion to actively building strength and endurance. Progressive loading is key – gradually increasing the stress on the healing tendon. Begin with calf stretches‚ targeting both the gastrocnemius (straight leg) and soleus (bent knee) muscles to improve flexibility and range of motion.
Eccentric heel drops‚ performed both with a flat foot and bent knee‚ are central to this phase‚ promoting tendon adaptation and strength. Resistance bands add another dimension‚ challenging plantarflexion. Simultaneously‚ single leg balance exercises enhance proprioception and stability. A supervised active rehabilitation program‚ as highlighted in recent studies‚ is vital for optimal outcomes. Remember‚ pain should be monitored closely; any increase signals a need to adjust the intensity. This phase prepares the tendon for the demands of returning to activity‚ building a solid foundation for the final stages of rehabilitation.
Calf Stretches (Gastrocnemius & Soleus)
Calf stretches are foundational for restoring ankle range of motion and preparing the Achilles tendon for increased loading. The gastrocnemius stretch‚ performed with a straight knee‚ targets the upper calf muscle. Lean forward against a wall‚ keeping your heel firmly planted‚ feeling a stretch in the upper calf. Hold for 30 seconds‚ repeating several times.
The soleus stretch‚ with a bent knee‚ focuses on the lower calf muscle. Maintain the same wall lean‚ but gently bend your knee‚ deepening the stretch in the lower calf. Again‚ hold for 30 seconds and repeat. These stretches should be performed gently‚ avoiding any sharp pain. Consistent stretching improves flexibility‚ reduces stiffness‚ and enhances blood flow to the tendon‚ promoting healing. Proper form is crucial; avoid bouncing or forcing the stretch. Integrating these stretches into your daily routine supports the progressive loading process‚ essential for a successful recovery following an Achilles tendon rupture.
Eccentric Heel Drops (Flat & Bent Knee)
Eccentric heel drops are a cornerstone of Achilles tendon rehabilitation‚ promoting tendon strength and resilience. These exercises involve slowly lowering the heel below level‚ emphasizing the lengthening phase of the calf muscle contraction; Begin with flat-knee heel drops‚ standing on a slightly elevated surface. Rise onto your toes using both legs‚ then slowly lower the affected heel‚ controlling the descent.
Progress to bent-knee heel drops‚ which target the soleus muscle more specifically. Repeat the same motion‚ but with a slight bend in the knee. Start with three sets of 15 repetitions for each variation‚ gradually increasing the number of sets and repetitions as tolerated. It’s vital to perform these exercises slowly and deliberately‚ focusing on controlled movement. Discomfort is expected‚ but sharp pain indicates overexertion. Eccentric loading stimulates collagen synthesis‚ improving tendon properties and reducing the risk of re-rupture. Consistent performance‚ guided by a physical therapist‚ is key to optimal recovery.
Resisted Plantarflexion with Band
Resisted plantarflexion utilizes elastic resistance bands to strengthen the calf muscles and Achilles tendon. Securely anchor a resistance band around a stable object‚ positioning it to provide resistance when pointing your foot downwards. Sit with your leg extended or stand‚ looping the band around your foot. Slowly push your foot against the band’s resistance‚ performing plantarflexion – pointing your toes.
Maintain controlled movement throughout the exercise‚ resisting the band’s pull during both the concentric (pushing) and eccentric (returning) phases. Begin with a light resistance band and gradually increase the resistance as your strength improves. Perform three sets of 15-20 repetitions. This exercise enhances calf muscle endurance and prepares the tendon for more demanding activities. Proper form is crucial; avoid compensating with other muscle groups. Consistent implementation‚ alongside other rehabilitation exercises‚ contributes to a full and functional recovery‚ rebuilding strength and stability in the ankle and lower leg.
Single Leg Balance
Single leg balance is a foundational exercise for restoring proprioception and stability following an Achilles tendon rupture. Begin by standing near a stable surface for support‚ if needed. Slowly lift one leg off the ground‚ maintaining a slight bend in the standing knee. Focus on keeping your body upright and minimizing any swaying motions. Engage your core muscles to enhance stability.
Start with short hold times‚ aiming for 30 seconds‚ and gradually increase the duration as your balance improves. Progress the exercise by performing it with your eyes closed‚ or on an unstable surface like a foam pad or balance disc. Perform three sets of repetitions on each leg. This exercise challenges the muscles surrounding the ankle and improves your body’s ability to react to changes in balance. It’s crucial for regaining confidence and preventing re-injury‚ preparing you for more dynamic movements and functional activities. Consistent practice is key to restoring neuromuscular control.
Phase 4: Return to Activity (12+ Weeks)
This phase marks the transition back to your desired activities‚ demanding a carefully structured progression. Begin with low-impact exercises like cycling or swimming to build cardiovascular fitness without stressing the repaired tendon. Gradually introduce plyometrics‚ starting with calf hops and progressing to jump rope‚ focusing on proper form and controlled landings.
Agility drills‚ such as cone drills and shuttle runs‚ enhance quickness and coordination. Proprioceptive training continues to refine balance and joint awareness. A running progression is vital‚ starting with short intervals of jogging and gradually increasing distance and intensity. Finally‚ incorporate functional exercises specific to your sport or activity‚ simulating real-game scenarios. Remember‚ listen to your body and avoid pushing through pain. A supervised rehabilitation program‚ as explored in recent studies‚ is crucial for a safe and successful return to activity‚ minimizing the risk of re-rupture and maximizing long-term function.
Plyometrics (Calf Hops‚ Jump Rope)
Plyometrics are crucial for restoring the explosive power needed for running and jumping‚ but must be introduced cautiously. Begin with bilateral calf hops‚ focusing on quick‚ controlled movements with minimal ground contact time. Ensure proper landing mechanics – avoid collapsing inwards or excessive pronation. As strength and control improve‚ progress to unilateral calf hops‚ increasing the challenge to the recovering Achilles tendon.
Jump rope is an excellent plyometric exercise‚ but start with short intervals and low intensity. Pay close attention to your technique‚ maintaining a slight bend in your knees and absorbing impact effectively. Gradually increase the duration and speed of jumping‚ monitoring for any pain or discomfort. Remember‚ the goal is to retrain the tendon to withstand dynamic loads. A supervised program‚ as highlighted in recent research‚ is essential to ensure proper progression and minimize the risk of re-injury during this demanding phase of rehabilitation. Prioritize quality over quantity.
Agility Drills (Cone Drills‚ Shuttle Runs)
Agility drills are vital for replicating the multi-directional movements required in many sports and daily activities. Initiate with simple cone drills‚ focusing on controlled changes of direction at walking pace. Emphasize maintaining a stable base and avoiding sudden stops or pivots that could overload the Achilles tendon. Gradually increase the speed and complexity of the drills‚ incorporating lateral shuffles‚ carioca‚ and figure-eight patterns.
Shuttle runs are another effective way to challenge agility and endurance. Begin with short distances and slow speeds‚ progressively increasing both as tolerated. Pay attention to proper running mechanics‚ ensuring a full range of motion and efficient ground contact. A supervised active rehabilitation program‚ as explored in recent studies‚ is key to safely progressing through these drills. Monitor for any signs of pain or swelling‚ and adjust the intensity accordingly. Remember‚ the aim is to rebuild confidence and functional capacity‚ preparing the tendon for the demands of return to activity.
Proprioceptive Training
Proprioception‚ the body’s ability to sense its position in space‚ is often compromised after an Achilles tendon rupture. Restoring this sense is crucial for dynamic stability and preventing re-injury. Begin with simple exercises like single-leg stance on a stable surface‚ gradually progressing to unstable surfaces such as foam pads or wobble boards. Focus on maintaining balance without relying on visual cues – close your eyes to increase the challenge.
Incorporate exercises that involve perturbations‚ where a partner gently pushes or pulls you off balance‚ forcing your body to react and stabilize. This mimics the unpredictable demands of real-life activities. Research highlights the importance of supervised rehabilitation programs in addressing proprioceptive deficits. Regularly assess balance and coordination‚ and adjust the exercises based on individual progress. Effective proprioceptive training enhances neuromuscular control‚ improving reaction time and reducing the risk of future complications‚ ultimately facilitating a safe return to function.
Running Progression
Returning to running after an Achilles tendon rupture requires a carefully structured progression to avoid re-injury. Begin with walking‚ gradually increasing distance and intensity. Transition to a walk-run program‚ alternating between periods of walking and short bursts of running. Monitor for any pain or discomfort; if present‚ reduce the running interval and increase the walking period.
Increase running duration and frequency incrementally‚ adhering to the “10% rule” – avoid increasing mileage by more than 10% per week. Focus on proper running form‚ including a midfoot strike and efficient stride length. Incorporate speed work‚ such as interval training‚ only after achieving a solid base of endurance. Functional exercises specific to your sport are vital during this phase. A meta-analysis suggests that supervised rehabilitation‚ including a progressive running program‚ yields optimal outcomes. Listen to your body‚ and prioritize quality over quantity throughout the running progression.
Functional Exercises (Sport-Specific)

The final stage of rehabilitation centers on replicating the demands of your specific sport or activity. This involves exercises that mimic the movements and forces experienced during gameplay or performance. For runners‚ this might include hill sprints‚ agility drills‚ and varied terrain running. Athletes involved in jumping sports should focus on plyometrics and landing mechanics.
For sports requiring quick changes in direction‚ incorporate cone drills and shuttle runs. Gradually increase the intensity and complexity of these exercises‚ ensuring proper form and control. A supervised active rehabilitation program‚ as highlighted in recent studies‚ is crucial for a successful return to activity. Remember that correspondence with a physical therapist is vital. Prioritize exercises that address any remaining deficits in strength‚ power‚ or proprioception. This phase aims to bridge the gap between controlled rehabilitation and the unpredictable demands of your sport‚ minimizing the risk of re-injury and maximizing performance.